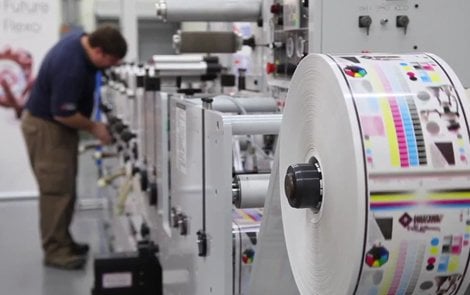
Flexo Press Fingerprinting – What’s it all about?
Flexo printers face many challenges, including improving print quality, shortening make-ready times, and reducing waste. Flexo press fingerprinting can help achieve these goals, so I prepared the following “Do’s and don’ts”, including pointers on how to approach the process. I shared this insight with Flexo Gravure Global, a leading trade publication serving the flexo industry, and wanted to share it with you.
What is the main reason for fingerprinting a press? What are the primary benefits achieved?
The purpose of fingerprinting a press is to determine the printability of text and lines, as well as quantifying dot gain values. Generally after a fingerprint run, a dot gain compensation curve, or DGC, is created to allow the printed tone values to match a standard.
Is it possible to quantify productivity gains from fingerprinting a press versus not going through the process?
Fingerprinting helps to validate that the settings used on the press and in prepress will give the desired end result. Without fingerprinting, there is a good chance that the actual result will not equal the desired result. Quantifying exact productivity gains is a bit difficult, but removing the fingerprinting step will generally result in lost time on the press during setup.
What are the tangible results of the fingerprinting process that are used in ongoing press operation?
Verifying that density standards can be met using actual material, press speed, ink, etc. Also, the press curve or DGC that was produced from the result of the fingerprint.
How often should it be done? Over the course of continuing production, what issues would start to appear that might indicate that fingerprinting should be re-done?
Production jobs should contain density targets and tint wedges to check print consistency. If these targets are consistently measuring the same but not the desired result, the press curve made may need to be adjusted. A fingerprint will need to be redone if there is a change to substrate, varnish, lamination, ink, anilox, plate, stickyback… essentially if any number of the variables change, the fingerprint should be reprinted.
Can fingerprinting a press be used as a method to get it back in peak operating condition?
Fingerprinting should be used to determine the operating condition of the press at a given moment with a set of conditions. Routine Preventative Maintenance should be completed to ensure that the press is in peak operating condition.
What are some of the basic parameters for the press set up? Should all press stations be set up identically (e.g., anilox rolls)? Should the fingerprinting be performed with new components (e.g., plates, stickyback, doctor blades, anilox rolls)?
A banded anilox trial should be completed to determine the proper anilox for each ink color. A clean anilox and new doctor blades, as well as stickyback and plates, should be used for a fingerprint. Cylinders/sleeves should be checked for TIR and consistency, and substrate should have the proper surface tension. Ink should also be running to the recommended pH and viscosity. It is a good idea to have plate and ink manufacturers onsite during the fingerprint run.
Are there any special considerations for the inks that are used for the fingerprinting process?
Inks should be the right pigment strength, pH & viscosity. See above.
What are common mistakes that should be avoided?
Make sure the press is running at production speed. Avoid fine-tuning so closely that a standard operator can never repeat the result from the end of the fingerprint. Be sure to document anilox, ink properties, tape, plate, densities, and run speed. Be sure everyone is included – press operator, ink, plate, and tape manufacturers.
Should fingerprinting be done for each different substrate or types of substrates (paper, film, flexible packaging, etc.)?
Yes – each substrate may behave differently and will probably have different ink absorption characteristics.
Is there a specific sequence or order that steps should occur in the process of fingerprinting a press?
- Banded anilox roll test to determine proper anilox per color. (weeks in advance).
- Ordering of substrate & inks
- Proper QC of plate room and materials – create plates
- Group meeting to define priorities of the fingerprint – what is the intended result? Who is responsible, etc.
- Mount the plates – get on press. Run proper QC checks press side on all materials.
- Run up to speed, flag the good material that was run at production speed. Check densities, ink laydown, minimum dot, and L*a*b* of ink colors to verify it meets a standard.
- Record all variables
- Repeat steps 6 and 7 until the group is happy with results.
- Measure the print sample for dot gain – it is best to pull multiple samples throughout the final run and average the measured results.
How long does it typically take to go perform the fingerprinting process? Are there legitimate shortcuts that could be taken to streamline the process while not materially compromising the results?
Depending on the size of the press, it could take from a few hours to a full day (if there are any surprises). The process of fingerprinting a narrow web press could take 2-3 hours, a wide-web press may take longer.
Contact the Flexo Experts at Anderson & Vreeland for all your digital printing & pressroom needs.